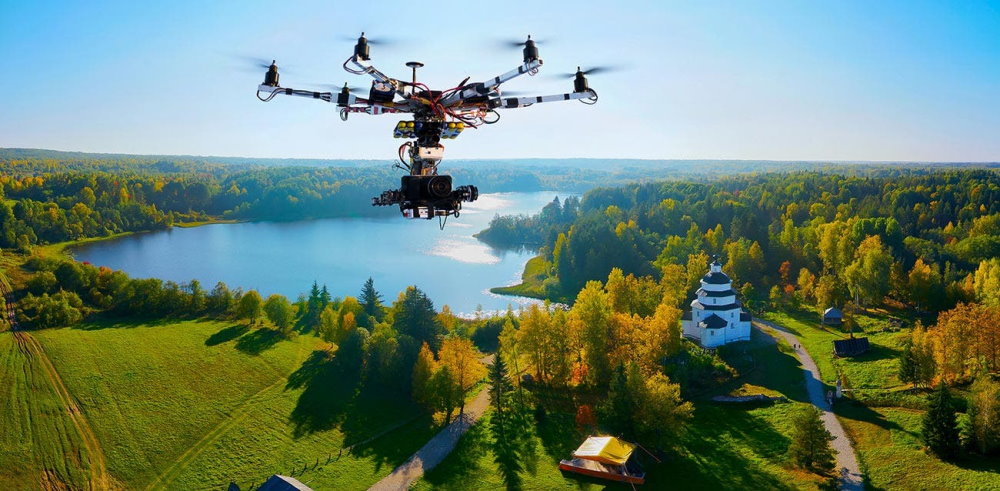
Amazing aerial shots and once-in-a-lifetime photography of remote locations used to be limited to professional photographers with some serious resources and equipment. But thanks to major advancements in camera and drone technology, even amateurs can now take amazing shots that rival some of the best photography and videography ever produced.
All of that does require picking an appropriate drone and knowing how to handle the hardware. Plus at least a basic understanding of some photography and editing principles doesn’t hurt, of course. That paired with the massive rise drones have had in popularity, which has resulted in an explosion of new options flooding the market, makes for an overwhelming time.
So we decided to create this guide to help aspiring and amateur drone photographers get the most out of their newfound hobby (or hustle if you’re looking to turn it commercial!).
Why Drone Photography?
Aerial photography opens up a whole new avenue of incredible opportunities for both photographers and filmmakers. Some people have a wrongful idea that this will limit what they can do to wide aerial shots. While there certainly are complexities that do come up which can hamper your shoot – and well discuss those here – the possibility for innovation is nearly limitless.
The only thing that can greatly hamper what you can do is your setup, which is why we’re going to be discussing things you should know if you’re looking to buy a camera drone for photography or filming. Of course, many of these tips can also still apply if you’re planning to use the drone for other professional applications like in agriculture or inspection.
Buying a Camera Drone: What To Consider
Finding the best drone comes down to assessing your own needs and matching them with the hardware and software that will suit you the best. There are a lot of different drones out there, and a number of things to consider if you want to get the most out of your purchase.
To start off with, will you only be using the drone for photography, and if so, what type of photography do you plan on doing? How complicated are you willing to make this for yourself? Most consumer drones now come with cameras already installed, but the high-end models support a range of camera attachments instead. That gives you more control and flexibility but also tends to be much more expensive and complex. Unless you go with a drone that can support a GoPro attachment, which is easier to manage if you’re already familiar with how the GoPro works. Something else to consider is the drones that come with built-in cameras don’t always have a high resolution – unless you’re willing to spend quite a bit.
Your budget is a big consideration too. Not just because you don’t want to spend money you don’t have, but also because learning to fly a drone can be a tricky process. Despite how easy some people make it look, drone crashes are pretty common and they can seriously damage the hardware. So if you’re not so invested in learning how to fly like a pro, then opting for a smaller, more lightweight, and less expensive drone that’s easier to fly might be the better option.
Consider what type of images you want to capture. Some drones can only fly so far due to frequency limitations (how far they can pick up signals from the drone controls) Some drones come equipped with lights to help with filming in conditions with poor lighting or at night. Some drones are too small and lightweight to handle even a small amount of wind.
Drone Camera Basics
If you’re a photographer, then you’re likely already familiar with most of the terminology and camera considerations we’ll mention here. But for the sake of making this a go-to guide for aspiring photographers as well, we’re going to be going over some camera basics as well as important considerations when buying a drone with a camera and buying a separate camera for a drone.
Understanding Camera Resolution
While drone cameras can capture images at varying resolutions (depending on the camera) they are essentially video cameras and so their quality is measured in resolution instead of pixels. However, if necessary, you should be able to find the pixel specifications of the camera drone you’re considering buying.
You’re unlikely to find a drone camera with a lower resolution than 720p and they can go all the way up to 4K. Even 8K drones are now starting to enter the market, although they’re still quite expensive. On the other end, it is possible to get what you need from a more cost-effective 720p drone. But if you’re planning on producing anything in a professional capacity then you’re likely better off going for at least a 1080p HD camera drone.
Video Frame Rate
When playing a video, it plays back in a certain amount of frames per second (fps), the lowest rate usually being 30 frames per second but some can go as low as 24 fps. As the term suggests, fps is the number of frames a camera takes in a shot per second. So naturally, more frames equals a smoother effect.
Just to clarify, less isn’t necessarily worse when it comes to fps in videography. Some drone owners prefer to shoot their videos at 24 fps because it creates a more cinematic effect that way. Drone cameras are also capable of going up to 120 frames per second, and we’d recommend at least 60 fps for anyone that wants to shoot either fast-moving objects or slow-mo videos.
Many of the commercial drones available on the market today are capable of switching between different camera resolutions and frame rates. That means you can fully customize the quality and frame rate you want to get that perfect shot. Just keep in mind that the higher you go in terms of quality, the more you’re likely going to have to spend.
Buying a Camera as a Drone Attachment
If, instead of buying a drone that comes with a built-in camera, you want to be able to attach your own camera, there are a few other considerations to take into account. These make a great option if you already own a decent camera that you are familiar with and would like to use. There are some fantastic camera-less drones readily available, and many are budget-friendly thanks to the fact that they don’t come with an expensive camera.
First up, you’ll need to make sure that the drone you want to buy supports a camera attachment. Then you you have to ensure that it supports the camera you want to use, in terms of fitting, software interface. For example, many of the cameraless DJI drones support GoPro attachments and so you’re assured that the software is compatible.
Weight is another important consideration, as drones come with a payload limit that means they can only support camera (and other attachments/loads) of a certain weight. Smaller and lighter drones will likely not be able to support bulky professional equipment, which means you’ll have to look for a more heavy-duty drone. Sometimes this means going for a hexacopter (6 arms) or octocopter (8 arms) instead of the usual quadcopter (4 arms).
Outside of budgeting considerations, it’s likely better to just stick with a camera drone. There are many options on the market and you already know that they work without any extra effort.
The Hardware
Before taking your drone out for its maiden voyage, you should familiarize yourself with all of its hardware and software first. This guide won’t be a full breakdown of drone hardware, but will be focusing on the parts that have to do with the camera.
Gimbals
What good is an expensive camera if the footage is stilted and shaky due to the drone? That’s where the gimbal comes in, and it’s just as important an element as the drone’s camera. The gimbal is the part that attaches the camera to the drone, sort of like an additional arm.
The gimbal keeps the camera level (to the horizon usually) and allows for both tilt and roll in the camera. The result is that the camera can actually move around separately from the drone, giving you a lot more leeway to take the shots you want. Without a gimbal (if the camera is directly attached to the drone) you can only take footage in the direction that the drone is flying. Plus, since there is no gimbal to offset the vibration caused by the drone, it will likely also result in shaky and unusable footage.
There are two types of gimbals:
- A two-axis type that can help the camera tilt and cant in different directions, and
- A three-axis type that offers even more freedom by helping with both tilt and cant, as well as being able to pan. That means the camera can get a clear 360-degree shot (so long as the drone landing gear can fold away).
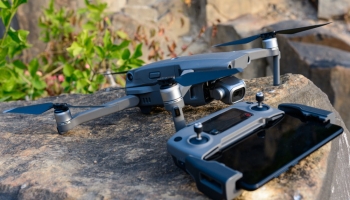
Drone Controller / Transmitter
The transmitter (or controller as it’s more commonly known among UAV newbies) doesn’t just control the drone, it’s also an essential part of taking any type of aerial footage. Not only will you be able to set certain camera settings and make adjustments via the controller, but it’s also the only way you’ll be able to see what your camera sees. Although some drone pilots eschew the regular tablet/smartphone setup for a VR rig that lets them experience the footage in first-person instead. This isn’t generally recommended for new drone owners, however, as it can be disorientating and requires confidence in one’s ability to accurately control the drone.
Drones don’t always come with a transmitter of their own – some simply work with an app that you can download on your mobile device. Before purchasing a drone, you need to look at the frequency of the drone’s transmitter/receiver as this dictates how far the drone can fly before losing connection with your controller. Small “starter” drones tend to not be able to go very far.
Drone Batteries
Something to keep in mind when buying a drone is that they don’t all offer the same amount of flight time. Some can go as low as 15 minutes before needing to be recharged. Drone batteries are lithium-based, and Lithium-polymer (LiPo) batteries are the most commonly used type. These batteries are one of the few parts of the drone that can be taken off and reattached as needed.
Due to their relatively short battery life, most drone owners take one or more fully charged spare batteries along when they head out to fly for the day. This way, when you notice the battery power is starting to get low, you can simply replace it and head back out again. Of course, you’ll have to plan your shoots around this so that you don’t have interrupted footage – but more on that in a bit.
Video Streaming
Back in the day (like less than a decade ago), drones would capture footage while flying but you could only actually view the photos/footage after the flight by inserting the camera’s SD card into a compatible device. Nowadays, as explained above, the drone camera’s footage gets streamed live to the drone’s controller.
That said, you still need an SD card as the footage still gets stored on the camera. So you’ll want to make sure you have a big enough card to store all of the footage you want. If you plan on shooting in 4K, then you’ll want at least 128GB of free space to ensure you don’t run out of space before the shoot ends.
Important Photography Tactics
1. Framing
Any photographer that’s been in the industry for longer than a day knows about the rule of thirds. As in, that the focus element of the shot should appear off-center towards one third of either side of the image. This still applies when you’re using a drone.
It can be harder to accurately gauge your scene when you’re flying, which is why many drone flyers opt to enable the grid lines overlay on their controller or app. And, of course, rules are meant to be broken, and you could always just enable the center point overlay instead to get a better idea of what your composition will look like.
Either way, framing should still be an essential consideration when you’re shooting with a drone and the drone capturing techniques we discuss later in this article can help with that. Because now you don’t just have to consider camera angles from the ground level, but from pretty much every angle.
2. White Balance
Ever heard someone refer to the temperature of a photo? Well, that’s where white balance comes in. Essentially, it refers to how warm or cool the photo looks in terms of color temperature. It’s why a photo will often look too yellow if you take it indoors, especially at night, and why the same area will suddenly look more white/blue if you turn the flash on.
Both color temperature and white balance is measured in a unit called Kelvin, and if you remember anything from high school science, Kelvin is also used to measure temperature just like degrees and Celsius. There is quite a bit of science that goes on behind the whole concept, and while you don’t have to know all of that, it is important to understand how light/color temperature influences your shot.
Different types of light will produce different levels of warm or cool light, and these range between 1000 K (which is warm/orange) and 10,000 K (which is cold/blue). In photography/filming, you have to be very aware of how that will influence your shot, because you want to get the white balance as close to neutral as possible. Keep in mind that white balance is the opposite of color temperature.
White Balance uses the exact same measuring unit as color temperature, so to get your shot back to neutral you have to add the exact opposite amount of white balance. Here’s an example: Let’s say you’re doing an early morning shoot. Morning sun is usually in the range of 3500 K in terms of color temperature so you’ll want to set your white balance to around 6500 K in order to balance it out. Mid-day sun is considered a neutral color temperature ranging between 5200 K and 6000 K.
Auto vs. Manual White Balance
Despite what photography purists would say, setting the white balance to auto isn’t the death of good photography. Automatic white balance is perfectly acceptable for those who are just starting out and even some veteran professionals if they deem the situation is right and they’re getting the shot they want. No setting is the same and light can change quickly, which requires quick adaptation, and in that case, auto white balance can actually come to the rescue.
On the other hand, there is a lot to be said for having more control over the composition of your shot, which is why manual settings also have a lot of merit. It’s just obviously more complicated and will require that you spend time learning about white balance and adjusting the settings as necessary throughout the shoot. If you know what you’re doing, however, it can result in some magnificent shots that will make post-editing much easier too.
If you want sort of a mix of both, many drone cameras let you choose an automatic setting type that depends on the weather, like sunny, cloudy, etc., and then customize those settings. Some photographers prefer to use a white balance card (a specific grey card or just a white piece of paper) to tune their shoot on location.
3. Sun Exposure
Usually, there are plenty of inventive ways photographers can use to get around sun exposure and other weather implications. With a drone, all of those techniques are virtually non-existent. You’re at the mercy of the sky and there’s no real way to block the sun or ward of any wind or rain when you’re up there.
The result is that drone photography requires a lot of forethought and planning to ensure the elements don’t clash with your project. This includes checking the weather forecast for your shooting area, checking wind and temperature, and planning for where the sun will be at different times of the shoot.
4. Shooting Long Exposure with a Drone
Long exposure shots are pretty popular among nature photographers and it is entirely possible to get these shots using a drone. Much like with a regular camera setup, shooting a long exposure shot requires that you adjust the camera’s shutter speed, ISO, and aperture.
Drone photography adds another layer of complexity to the whole venture. It requires that the drone is kept still for longer periods of time to coincide with the longer shutter exposure time. However, if you manage to pull it off, you can get some exceptional shots as drone photography lends itself well to long exposure landscape, sky, water, and shots with lots of movement.
Drone Camera Tips
Choosing the right settings for your shoot requires that you understand both your camera and your drone really well. We’re going to be providing some tips here, but at the end of the day, perfecting the craft and getting amazing footage is going to come down to:
- Understanding the capabilities of said equipment through learning and practice.
- Experimenting with what your equipment can do.
1. Understanding Exposure
Not every camera drone lets you adjust the color and exposure of the images you capture, but the DJI models all do. With these settings, the camera will automatically adjust the images for you right after they’ve been taken. You’re able to set the color balance, contrast, and saturation of the images before starting the shoot. Of course, you’ll want to be careful to not go too overboard with these settings because you won’t be able to undo much of it if you need to in the post-shoot editing.
If you want the option of having both these edited versions and unedited versions from your drone, then you should change the image format settings so that you get both the JPG and RAW (original) images.
2. Choosing the Right Image Format
Once again, not all drone brands offer different image formatting options, but the DJI models let you choose between JPG and RAW. There’s also the option to choose JPG + RAW which gives you two versions of the same image. So what’s the difference?
JPG is a smaller, edited version of an image. It lacks a bit in quality when compared to the RAW image, but it makes up for that by not taking up as much space and adjusted color and exposure settings. A RAW image is just that, the raw, unedited version of an image taken with the full quality capacity of the camera. RAW images take up much more space but they are perfect for professionals who want quality images to edit in post-production. If you select the JPG + RAW option, you get both versions of the same images stored onto your SD card.
3. What About All These Camera Settings? Help!
Having trouble figuring out all of the different settings on your drone camera? There’s a lot to keep in mind, and a lot of it depends on where the shoot will take place, the weather, and the type of shots you want to take. Post-production editing is another consideration as there’s only so much you can do to change or enhance things with the footage you’ve got.
We know there’s a lot of things to consider, so here’s a quick breakdown of the most important camera settings you’ll likely come across.
Important Camera Settings
For images:
Generally, images don’t require a lot of settings changes right off the bat, unless you’re looking for a specific style or outcome that can’t be replicated just as well via editing.
White Balance: Auto
This is the easiest way to ensure that the white balance in your images is as close to neutral as possible. The auto setting isn’t always perfect, and a professional might be able to get their shots closer to neutral but it is a lot of extra work that isn’t always necessary.
Color: None or Normal (TrueColor)
Unless you have a very specific idea in mind, you should keep the color and exposure settings as-is. This setting already provides an excellent color balance and contrast. If you choose the TrueColor profile (if that’s an option) it will provide images that are as close to real-life as possible. That said, some photographers feel that the color saturation in the normal setting is too high, in which case it’s fine to tone it down a bit.
Style: Standard
If you leave your image style settings on the standard setting (+0, +0, +0), it won’t adjust the saturation, contrast, or sharpness of the image. This is fine for most photographers, especially those just starting out. Plus, if you want any of these elements changed afterward, you can just edit the photos using a photo editing program.
Exposure: Automatic
For most photographers, leaving the exposure on the auto setting should work just fine. The drone camera does an excellent job of regulating light and shadows on its own, and leaving this as is means there’s one less thing to constantly check and adjust. If you have a DJI drone, you can also enable the “tap exposure” feature, which lets you tap a specific area or object to have the camera automatically adjust the exposure for that area.
DJI’s Over Exposure Warning setting:
Many drone photographers prefer to shoot with the “Over Exposure Warning” setting turned on as this handy feature shows you which parts of your shot are currently over exposed giving you the opportunity to quickly change your settings. These areas have small stripe overlays shown on them on your screen so you can easily identify them, which is why many people also refer to this as the “Zebra Stripe” setting.
For Video:
These settings should work for most videographers across all major drone brands and models. While the settings are more geared towards new and intermediate drone owners, professionals can also benefit from these tips.
Format: MP4 or MOV (depends)
Most drones support both MOV and MP4 formats. Which one you choose is up to how you plan on using the video after shooting.
MOV was designed to work with Apple products, so if you plan on using a Mac to edit your videos, for example, then this would be a good bet. Luckily, MOV is also supported by Windows and many other Windows-based programs so cross-platform sharing shouldn’t be too much of an issue.
MP4 is a more widely adopted format, used by both Windows and Android devices, and would be a better option if you plan on using either of those platforms or sharing the video around a lot.
Either way, the format you choose doesn’t have a big impact on quality either way, so you’re free to pick the option that works best for you.
Picture Profile: D-Log
Additional Settings: Normal or Custom (0, -1, -1)
Many people will tell you that people who are new to drones should just stick to the “None / TrueColor” color profile, depending on your drone. However, you’ll get much better results when opting for D-Log, especially if you add some custom settings with sharpness, contrast and saturation. The result is a vibrant picture with more dynamic range. D-Log is known for having a flat, muted color profile that provides a lot of detail and keeps shadows from being too dark and highlights from being too light.
Just keep in mind that D-Log footage usually has to be edited to look truly great. If that’s a no-go for you, then you would be better off going for Normal. If you’re fine with editing, but want something with a higher color range then you could go for D-Cinelike (on DJI drones) instead. D-Cinelike also produces more muted footage that has to be edited and color-graded afterward, but this mode can produce incredibly striking footage when shot and edited correctly.
As for the additional settings, these are set as is because they provide the sharpest detail with the least amount of
Video Size & Frame Rate: Highest (4K if possible), 30fps
Generally, you’ll want to go with the highest video resolution your camera allows. There are very few reasons (if any) to opt for lower-quality footage. The frame rate is another matter, as there are varying opinions and reasons to use different speeds. Usually, you won’t go wrong by opting for 30fps as this is a nice standard that will yield great results whether you’re shooting long exposure shots or high-speed takes.
If you end up wanting a more slowed-down cinematic shot in your video, you can always change the frame rate in post-editing to something like 24fps for that buttery smooth visual touch.
Shutterspeed: Depends on Frame Rate
Generally, when you’re shooting video, you want your shutterspeed to be 1 over double your frame rate. This advice holds true regardless of the drone or type of camera you’re using. So if you’re shooting a video at 30fps, then you want your shutterspeed to be 1/60. The result is smooth, uninterrupted footage that flows at a natural-looking pace.
White Balance: Auto
For most drone owners, keeping their camera’s white balance settings on auto should work just fine in most situations. With auto enabled, the camera will automatically adjust the white balance throughout the shoot. It’s not always absolutely perfect, which is why many professionals prefer manual settings, but on average it will provide beautiful footage in vivid colors that requires little editing.
If you do prefer to set your white balance on manual, keep in mind that you’ll need to adjust the Kelvin settings correctly to get a neutral balance and offset the influence of external light sources. Using manual white balance also ensures that the color temperature won’t suddenly change as the camera automatically adjusts, producing a more consistent visual style.
EV Meter: Auto
EV stands for exposure value, and as the name suggests, measures the level of exposure in the shot. You want to keep an eye on your EV meter while you’re shooting to make sure it stays on 0. It can go as high as 0.3 on some occasions and still be fine, or go even a bit higher in direct sunlight.
Keeping the EV meter on auto means it will automatically adjust the exposure level to the correct level throughout the shoot. If you switch to manual, however, you’ll have to adjust the ISO of your shot as the EV meter can’t be edited manually.
ISO: Auto
Much the same as the EV meter setting, keeping ISO set on auto is the easiest way to achieve consistent results. ISO controls the level of noise and, to a degree, the exposure in a shot. If the ISO is set too high, the footage will appear noisy and too bright. If you’re comfortable with adjusting this setting to get the effect you want then go for manual instead, but the auto setting should work fine for many people.
Cool Drone Video Capturing Tricks and Techniques
Of course, these are just a few suggestions and we encourage you to experiment with new types of shots and tricks of your own!
The Most Cinematic Types of Drone Shots
1. The Tilt Down Reveal Shot
This is one of those shots that makes full use of the gimbal (and provides a fantastic reason for why you absolutely need to use the gimbal to its full extent in your videos). In this type of shot, you’re going to move the camera down while flying backward for full effect. This can be done to reveal a landscape or object as you’re flying over it. While the tilt down reveal shot can technically also be done while flying forward, it doesn’t quite have that same impact and may come across as awkward instead.
2. The Tilt Up Expose Shot
This type of shot is the exact opposite of the tilt down reveal shot. Essentially, you’re going to tilt the camera up slowly while flying the drone forward. The resulting effect is stunning, and lends a bit of gravity to an otherwise regular flyover shot. The tilt up shot can work just as well when flying the drone forward or backward.
3. The Gliding Side Shot
This shot requires that you keep the drone altitude and yaw steady, and just glide in a straight(ish) line while focusing on your subject from the side. It can be done both slowly or fast, depending on what you’re trying to capture. For example, if you want to shoot a car speeding by from the side perspective while following it down the road. In that case, though, you’d likely want to make use of a feature like Active Track to make sure you don’t suddenly lose track of your subject or change the distance/altitude.
4. The Panorama Curve
Want to get an enchanting shot of a range of mountains? How about a magical shot of the sun setting over the waves? Instead of having the drone fly in a straight line with the camera focused on the horizon, give the drone’s flight path a slight tilt so it curves instead. The result is a shot that takes in the landscape while focusing on one general point, creating interest and visual framing.
5. Pull Back Shot
Want a nice focus shot that brings some more oomph to the table? The pull back shot isn’t just very effective, but simple enough to pull off as well. While keeping the drone’s camera focused on the subject of your shot, pull back on the right stick while pushing the left stick forward slowly. With enough steady control, you can get a smooth cinematic shot – so it might take a bit of practice.
6. The Flyover
You’re using a drone so of course just flying over your subject is a type of shot that many, many drone photographers use. If you’re looking for something a bit more cinematic, you could try tilting your gimbal in different directions while flying over your subject to see what you get.
Some people even do a reverse shot, where they start above or near their subject and fly and tilt their camera in the opposite direction of what they want, then reverse the shot in post-editing. The end result is that your shot ends exactly where you want it to, which is why that type of shot is often used in real estate videos as well.
7. Point of Interest (POI) Shots
If you own a DJI drone, then you may already be familiar with this type of shot, because the DJI models have the POI mode. Since it’s an automatic flight mode, the POI shot requires little manual work from your side, making it one of the easiest shots to accomplish – and it looks great to boot!
8. The Rocket
Ever wanted to feel like an astronaut heading for space? Well, this move won’t get you there but it surely produces cool-looking footage. To pull off the rocket, simply keep the camera pointed down and focused on your subject while steadily flying the drone straight up. This type of shot is great for revealing an object or geometric shapes in architecture or nature.
9. The Fly Low Reveal Shot
Drone photography isn’t just about flying high and capturing a broad aerial view. It can also just mimic a steady walk forward close to the ground. The fly low reveal shot is exactly that, and when done right, can produce some of the most epic footage around.
Simply fly the drone as close to the ground as possible while slowly tilting the camera up to reveal your subject. Keep in mind that, the closer you fly to the ground, the more likely you are to crash into something. Also, the drone’s speed looks faster the closer you get to the ground, so make sure to slow this one down as much as possible to get that cinematic effect.
10. Tripod Shots
Tripod mode is another intelligent mode on the DJI platform, and is available for most DJI models. Essentially, it makes a drone easier to control and keep steady by limiting the drone’s maximum speed and reducing its braking distance.
By getting a better command over the fine controls of the drone, you can film various types of scenes including time-lapse videos, slow-motion videos, long exposure videos, and hyper lapses among others. Be creative with it!
Tripod mode also lets you shoot videos in areas with a lot of obstacles with more confidence, especially if you’re not as confident in your flying skills. This includes when you’re filming close to the ground or indoors.
To activate tripod mode, head into the air with your drone first then go into the drone’s intelligent flight mode settings and select tripod mode.
Other Tips
Adjust your gimbal pitch speed
How fast and well you fly your drone isn’t the only thing that affects the smoothness of the videos you capture. The gimbal also plays an important role, and as we established with the various types of drone shots outlined above, it can be integral to getting good footage.
Making sure your gimbal is set at the right pitch speed can have an enormous impact on the quality of your shoot. You don’t want jarring transitions that look exactly like you used a controller to move the camera around in jerky sections. You want an even flow from one point to the next.
So to achieve that, you’ll have to set the gimbal’s pitch speed before every shoot, depending on the type of shot you’re aiming for. There are two settings you want to focus on here: the max gimbal pitch speed and gimbal pitch smoothing. You can access these settings via your drone’s app under the camera gimbal advanced settings.
The default max gimbal pitch speed for most drones is 20, but you’ll want to slow it down for most of the shots mentioned above if you want that smooth cinematic effect. Adjusting it to somewhere around 10 should get you what you’re looking for.
The gimbal pitch smoothing setting, meanwhile, controls how quickly the gimbal’s pitch movement starts and stops. It helps to ensure that the camera doesn’t come to a sudden jarring standstill when you stop moving the camera. You can increase this as needed for an even smoother effect.
Adjusting Stick Sensitivity
If you’re having trouble getting your drone flying steadily without jerky movements, then you can try adjusting the stick sensitivity on your controller to even things out. The result is that you’ll have to push harder to make the drone move, which means it will move more slowly and thus be easier to control with less shaking. Of course, this is only possible if you’re using a controller and not just a smartphone with an app.
To adjust the stick sensitivity on your controller, head over to your settings menu and scroll down to the advanced settings option. Then click on the EXP settings to access your drone controller output. You should be able to adjust the throttle, rotation, and direction settings. You want to decrease the output of the controls in relation to your input.
The throttle controls usually don’t matter as much for shooting footage, so you’ll want to focus on the rotation and direction controls. You can decrease these, going as low as 0.20 or 0.10.
What is HDR and How Does it Work?
HDR is short for “high dynamic range”. Dynamic range is measured as the difference between the lightest highlight and the darkest shadow in a shot. Many drone photographers use HDR to balance out the contrast of particularly difficult shoots.
For example, Let’s say you’re a real estate photographer trying to capture a new property with all its lights on during sundown, you’re going to get quite the drastic contrast. All of the lights in the house will likely appear too bright, along with the sunlit sky, while everything else looks too dark to make out the details. HDR is how photographers undo that effect by combining an intelligent shooting mode and post-production magic.
There are a couple of different ways to enable HDR, depending on your drone/camera. Most high-end models across all of the current popular brands like DJI, Parrot, and Yuneec offer an HDR mode. Many of them also provide an auto-exposure bracketing (AEB) option.
HDR Mode? AEB Mode? What’s the Difference?
So both HDR and AEB involve taking multiple shots at different exposure levels and stitching them together to get the contrast just right. The difference between HDR and AEB on paper is quite simple – HDR stitches the photos together automatically while with AEB it has to be done manually using special software.
If you set the camera on HDR mode, it will take several photos in quick succession every time you click the shutter and automatically stitch them together to create the correct exposure balance. Usually, this works pretty well but the issue with this mode is that you have no control over what the end product will look like. So you’ll have to trust that the camera is doing its job correctly or rely on your post-editing skills to get it sorted. Take note that HDR can sometimes fail in very low lighting situations, resulting in an image where the exposure is extremely muddled.
With AEB mode, the camera will also take around 3 to 5 shots at different exposure levels in rapid succession every time you click the shutter, but it won’t stitch them together. This option gives you more control because you can put the images together yourself later using HDR software. The only downside is that you still don’t have control over the exposure levels at which the camera takes these photos. It will automatically select different exposure levels below and above the correct exposure.
There is a third option if you really want full control and are willing to put in some work. You can opt to take a number of photos yourself and manually change the exposure between each photo. The key to this is that you’ll need to keep the drone absolutely still between each photo and you’ll have to set the exposure correctly for each photo. If the drone moves at all between any of the photos, it will likely create distortion when you try to stitch them together in post, rendering the whole endeavor useless.
Drone Modes
The high-end commercial drones available today all come with a slew of different flight modes that can be helpful in filming and shoots. Some more budget-friendly models also come with an array of modes, though not necessarily to the degree of variety of more expensive ones.
We’ve already touched on some of the flight modes that are useful in photography here, including tripod mode, POI mode, and HDR mode, for example. But there are a whole bunch of other modes that can help you create amazing footage.
Here are a few great examples of even more drone modes that you’ll want to acquaint yourself with:
- Follow Me: This intelligent mode turns a drone into an automated camera crew. It can link up with a mobile device’s GPS, which will enable it to follow that mobile device. Most drones can also be set to stay in place and rotate in the direction of that device instead.
- Cinematic Mode: This mode reduces both the drone’s normal breaking speed and rotation speed (yaw movement). Though not to the same extent as tripod mode. The idea behind this mode is to make it easier to record softer footage without jarring breaks or turns.
- Waypoint Mode: If you plan your flight route ahead of time, you can do so using waypoint mode (on drone models that have this feature). It lets the drone automatically follow a predetermined path, with the option to stop for a moment at set points. This gives you leeway to focus on the shooting rather than the flying.
- Active Track: Active track is a lot like Follow Me, except it uses the drone’s camera to lock onto a subject instead of a mobile device’s GPS. That makes it a great option for tracking moving objects like boats or cars.
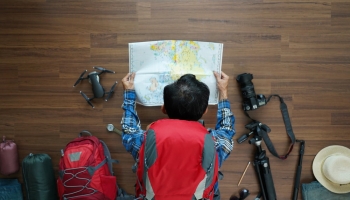
How to Plan Drone Shoots
Being prepared can save you a lot of time and frustration during a shoot, and it can help a lot with whittling downtime spent in post-production. So here’s a quick guide to effectively planning a successful drone shoot:
Check the Weather
Weather predictions are always important when it comes to planning a shoot outside, but with drone photography, it’s absolutely vital. Not just because the weather can ruin a potential shot, but because bad weather can seriously affect or even damage your equipment. After all, drone = aerial photography and there’s no protection against rain or the elements up there.
In addition to checking for rain, snow, and fog, you’ll also want to ensure it’s not too cold or windy in that area on the day. The cold can damage your equipment, while a drone can also only safely handle wind up to certain speeds. The general rule for wind is that it has to be less than two-thirds of the drone’s maximum speed. Be even more careful if you’re not an experienced flyer as not knowing how to work with the wind can easily result in a crash.
Check the Sun/Moon Positions
Knowing the positions of celestial bodies throughout your planned shoot isn’t just important if you want to, say, get a shot of the setting sun. It’s also vital whether you want that subject in your footage or not because there’s no protection against the sun up there.
With traditional photography, you can set up white board reflectors (among other things) and position your subjects to get your shot just right; but there are no such options when it comes to flying in the air.
Research the Area
Regardless of where the shoot will take place, whether outdoors or inside, you want to be familiar with your surroundings before setting up the shoot. This doesn’t just include environmental factors and potential obstacles, but laws as well.
Since there are quite a few laws that govern how and where drones can fly (both on a federal and local level), drone photography can get quite complex. You’ll want to be well-acquainted with what you can and cannot do to avoid getting into trouble.
Scout the Location
If possible, scout out your location ahead of time so you can see what the footage will likely look like ahead of time. You don’t even have to physically go there either, as tools like Google Maps have a great 3D map option that gives you a birds-eye view of a location. That way, you’ll get a pretty good idea of what you’ll be seeing on the day.
Set Up a Flight Path
There is plenty of amazing software available that can help you plan out your flight path ahead of time. Many of them also include regulation and weather warnings which can be immensely helpful.
Planning your flight ahead of time gives you more control over the whole process, ensuring fewer costly mistakes or mishaps. It will provide a good idea of how long the shoot ought to take as well.
Set Up a Checklist
There are two important checklists you’ll want to have ready for the day of the shoot.
The first is a hardware checklist to ensure that you don’t forget anything important like extra batteries. This checklist should also include all the important pre-flight checks you need to do before setting off.
The second is a list of the footage you’re aiming to get for the day if you’re planning on getting different shots. Include any specifics, like various drone modes you plan on including.
Popular Drone Photography Apps
Drone photography is all about utilizing the latest technology to produce amazing footage, so why wouldn’t you rely on some helpful apps to make the process even easier? Many of these apps can help in the planning process too, as they provide useful weather, lighting, and flight information. So let’s take a look at some of the coolest drone photography apps that can elevate your shoot to the next level.
PhotoPills
If you end up choosing only one app to accompany you on your flight, then it should be PhotoPills. This is one of the best apps currently out there for drone photographers, as it provides a laundry list of useful features.
There’s too much to fully cover here, but some of the highlights include:
- The ability to plan drone routes in different locations.
- Sun and moon movement as well as sunrise and twilight information to plan shoots around those lighting elements.
- Augmented reality to visualize the sun, moon, and milky way to plan shoots.
- A “degrees of focus” feature to choose how much focus there is on different elements in the shot.
- The ability to compute parameters needed to collect sequences of still images for time-lapse videos.
- A feature that calculates equivalent exposures in different lighting situations.
There’s a lot to discover here and play around with. The app is available for both Android and iOS.
Sun Surveyor
If you’re looking to plan the perfect sunrise or sunset shoot, maybe for a wedding, then Sun Surveyor is your new best friend. The app provides detailed information about the current position of the sun (and moon) as well as its path throughout the day.
You can accurately see the position of the sun in different locations at any time throughout the year – making it easy to plan ahead for a specific date. The app also includes a 3D compass and an ephemeris chart, although some features are locked behind a paywall. Sun Surveyor is available for both Android and iOS.
UAVForecast
As mentioned in the shoot planning section above, knowing what the weather will be like on the day of the shoot is essential. With drones, you have to plan your shoots around the weather, and an app like UAVForecast is incredibly useful for that. The app provides a whole host of useful information, including:
- Wind and gust speeds at ground level and any specified altitude level.
- Wind direction and chill.
- The overall weather forecast for the day (sunny, cloudy, rain, snow).
- Temperatures throughout the day.
- Cloud cover percentage and visibility.
- Sunrise and sunset times.
You can even enter information about your drone (like its weight and maximum flight speed) and intended flight path into the app, and it will tell you whether it’s safe to fly or not. The app is free and available for both Android and iOS.
GoPro Passenger
If you use a GoPro camera attachment on your drone and want other people to have access to the live camera feed then GoPro Passenger is an excellent choice. Not only can multiple people connect their devices to the drone via the app at once, but they can also take over control of the drone.
One of the ways in which this can be useful for a photographer, for example, is having one person fly the drone while the other focuses on keeping control of the camera. The app is free, very easy to use, and available for both Android and iOS.
Litchi
If you own a DJI drone and you’re looking for a strong alternative to the DJI Go 4 app, then Litchi should be your go-to choice. The app provides various different flight modes that can help you get fantastic shots without worrying too much about flying like a pro.
Some of the more notable flight modes include Panorama, Follow Me, Orbit me, and Waypoints. The Waypoints mode is especially robust, giving you full control over the path your drone takes while you focus on the filming. Flights can be planned ahead using the Mission Hub, and the drone will stick to the pre-determined path when on location.
Note that this is a paid app going at a steep $23. So you’ll want to consider just how much you’re going to be using these features to justify the purchase. There’s no doubt that Litchi was expertly crafted and worth every penny, however. It’s available for both Android and iOS.
Common Drone Photography Mistakes
1. Incorrect Composition
Drone photography is a lot more complicated than many people realize. With so many components to keep track of, as well as the various new angles to discover, there’s a lot of work involved. It’s certainly not as simple as just turning the drone on and starting the shoot.
Be sure to carefully plan ahead and work out what type of shots you want to get. Leaving everything down to seeing what you find in that moment usually doesn’t work out all too well. Try to experiment with different angles and flying styles as well and see what. This will make it easier in the long run as you get more comfortable with what you can do and will help with planning future shoots.
2. Just Shoot in JPEG
When taking aerial photos, you want to give yourself the best chance to create an amazing likeness, and JPEG greatly limits that. It’s not that JPEG is necessarily bad, but it does come with a lot of presets and hardcoded white balance, which is very hard to impossible to effectively alter in post-production. Shooting in RAW gives you full control over how your photos turn out.
As we mentioned earlier in the drone settings section, you can select the JPEG+RAW option, which gives you both formats to work with. This may take up more space on the SD card, but it’s worth it to get that perfect shot.
3. No/Overdone Post-Production
Post-production can be a tricky beast to master but master it nonetheless because it’s just that important. Some drone photographers don’t realize it’s necessary or just don’t feel comfortable enough with editing to work on their photos. But post-production is even more essential with drone photography than regular photography – at least if you don’t want your shots to turn out either dull or over-exposed.
On the flipside, that “too much gene” can kick in and lead to photos that look oversaturated or overworked. So much so, that the photo loses that element that made it special in the first place and instead has an entirely unnatural feel. It’s not a good look. So make sure to use moderation and think about changes critically. If needed, leave the image alone for a while and come back later to look at it again with fresh eyes.
4. Not Taking a Chance
Photography is all about seeing the world in a new way and what better way is there than from the air? Keep in mind that most people never get to see the things around them from the bird’s-eye perspective and what looks boring from ground level may actually turn out fascinating from above.
Take buildings, for example. We’re all used to seeing them from one angle, but when they were built, the plans were top-down. So most buildings actually have very pleasing shapes and structures when looked at from above. Take advantage of that because you never know what you might find.
5. Flying Too High
The ability to get up there and take new footage from above is an exciting endeavor but it’s easy to get swept up while soaring through the skies. In drone photography, higher isn’t always better.
This ties into the composition tip as well, in that, you need to take a scene you really like and focus on finding the best angle to present it. Sometimes, that means flying up close to it, and other times, it means staying far away and panning to the focus of the shot instead. You need to find that balance – but the potential payoff is certainly worth the challenge!
6. Footage That’s too Short
One of the most frustrating mistakes to make with filming on a drone is when you sit down to start editing and you realize that you flew too fast or the shots pan away too quickly. It’s not always possible to slow things down in post-production either, because you end up with slow-motion shots that look strange.
Rather take too much footage that you have to cut later than having to sit with the problem of figuring out how to extend footage. Or even having to do a reshoot.
Drone Photography Post Production Tips
If you’re already adept at photo-editing then you shouldn’t have much to worry about, as editing drone photos isn’t all that different from editing regular photos. Plus, if you followed the advice from above, and made sure to shoot in RAW, then you should end up with some pretty impressive results by the end.
Obviously, going into depth about photo editing would require a full guide of its own, and even that might not be entirely enough. The only way to truly get better at editing photos and video is to practice – although learning how to properly utilize the software you’re working with will make all the difference.
So, here are some of the most important elements of post-production editing that most drone photographers use on a regular basis. This is only a basic outline, however, that touches on editing concepts. In order to start mastering the craft, you’ll want to go more in-depth and explore each of these topics on your own.
Note: Start by choosing the software you want to use. Many drone photographers prefer Lightroom thanks to its ability to let you copy and paste settings on different photos, but Photoshop is popular too. Video editing is another matter, however, as there’s a lot of different opinions, but Adobe Premiere Pro and Lightworks both seem to be popular options.
White Balance Tool/Temperature & Tint
Since editing software is different, you’re going to need to find the correct tool to edit the white balance. For example, in Lightroom, it’s called the temperature & tint setting. Adjust this until you’re happy with the result. Some editing tools have automatic options, but you’re almost always better off manually adjusting the values. It does help if you took a photo of your grey card.
Adjusting Exposure, Saturation, Contrast, Highlights, and Shadows
We’ve bunched all of these aspects together because, again, the exact process you take is going to depend heavily on the software you’re using as well as personal preference. There’s no real “right” or “wrong” here as these are your photos and you have artistic license to create the end result that you like.
Many photographers have their go-to settings/looks that they prefer and are instantly recognizable as their work. Although, if you’re producing content for commercial purposes then there’s usually a different set of expectations you need to adhere to.
But the golden rule here is to just not push these settings so far that your photo looks fake – unless that’s what you want, of course. Most drone photography doesn’t focus on people, which does give you more creative leeway since it’s very easy to make people look unnatural.
Graduated Filter Tool
You don’t always want your edits to affect the entire photo, which is where the graduated filter comes in. With this tool, you can select exactly which area of a photo you want to edit, and you can add multiple graduated filters to one photo to edit various parts differently. The rest is fairly simple – just like with editing the exposure, contrast, and highlights of the full photo, you can just drag the sliders to edit that specific part.
Dealing With Fisheye Distortion
Also known as barrel distortion, this effect can ruin any good drone photo. Luckily, it can be easily solved by a number of software programs, including popular drone editing software like Lightroom and GoPro Studio.
This optical distortion happens when you’re using a wide-angle lens and its field of view is wider than the size of the image sensor. So you end up with a photo that curves inward towards the sides.
To solve this issue using Lightroom, for example, you’ll first need to isolate the parts of the photo that are distorted, then head to the “Develop” tab in the menu. Find the “Lens Correction” and click on it to have the program automatically adjust the photo. It’s as simple as that. The process is even easier when using GoPro Studio as you just have to click on the “Remove Fisheye” tool in the advanced settings menu without having to isolate any parts of the photo first.