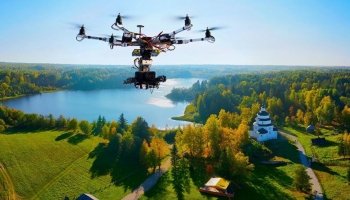
While the technology keeps improving, making quadcopters and other types of multi-rotor drones easier to manage, learning how to fly a drone can still be an intimidating experience.
You just purchased an expensive gadget and, regardless of whether you’ll be using it for fun or work, no one wants to wreck their new toy on its first test flight.
There’s also the fact that there are many best practices, rules and regulations and new skills and terminology you have to learn.
It’s a lot to take in. Therefore, even if this isn’t your first time flying a drone, you might still be having trouble getting the hang of things.
Thankfully, you don’t have to scour the internet to find what you’re looking for.
We have compiled everything you need to know about getting your drone up in the air in this handy guide.
Whichever make or model of drone you have, this ultimate guide will help you to navigate flight safely, responsibly and teach you the basic (and some more advanced) drone flight techniques.
UAV Terminology
You don’t necessarily need to know all of these terms by heart, especially if you’re only flying as a hobbyist.
However, it’s still a good idea to get familiar with this quick – but not exhaustive – glossary of popular drone-related terms.
AGL (Above Ground Level): AGL refers to how high the drone is above ground level. This includes any landmarks or buildings in the area. This means if a drone flies above a high building, the AGL starts on top of the building instead of the ground floor.
Altitude Hold Function: Much like A Mode, in this flight mode, the drone maintains a consistent altitude, except the pilot is still able to control its pitch, yaw and roll.
A Mode: This mode stands for “altitude mode.” It makes the drone automatically maintain a consistent altitude.
S Mode: This mode stands for “sport mode.” It allows operators to fly the drone at its fastest possible speed. This mode is currently only available in DJI drone models.
P Mode: This mode activates all sensors while hovering and helps with stability. It is one of the most popular modes for drone operators.
AUW (All Up Weight): This states the maximum weight of the drone, including add-ons and payloads.
BVLOS (Beyond Visual Line of Sight): This term is used when a drone is flown beyond the (unaided) line of sight of the drone pilot or visual observers who are aiding the pilot.
CoA (Certificate of Authorization): This is a type of authorization issued by the Air Traffic Organization for a specific drone activity. The FAA can take up to a month to review the application.
Controlled Airspace: A type of airspace that is monitored by air traffic control services and subject to certain restrictions based on its classification.
Uncontrolled Airspace: This is the portion of airspace that is not being controlled by air traffic control service and is deemed to be safe to fly for model and unmanned aircraft.
Daisy Chain: A term of endearment for the group of visual observers who help a drone pilot to keep the drone within line of sight.
FAA (Federal Aviation Administration): This is the federal agency that is in charge of all flight and aviation operations in the US, including creating and enforcing drone laws.
Flight Controller: This is the device that an operator uses to control a drone. Some drones use apps that can be downloaded onto smartphones as the controller.
FOV (Field of View): The extent to which the drone’s camera is able to view the world.
FPV (First Person View): This is when an operator is piloting a drone via the footage streamed from the drone’s camera. Be aware that this cannot legally be used to replace visual observer line of sight.
LAANC (Low Altitude Authorization and Notification Capability) system: This is a program created by the FAA to quickly and automatically provide (or deny) controlled airspace access to drone operators.
MSL (Mean Sea Level): A drone’s altitude in relation to sea level.
No Fly Zone: The FAA has designated specific areas as “no-fly zones,” such as around airports and critical infrastructure.
Payload: This is the additional weight a drone can carry.
PIC (Pilot in Command): The person operating the drone.
Pitch: When the drone moves up or down, vertically.
Roll: When a drone moves from side to side, horizontally.
Yaw: When a drone is rotated around, either clockwise or counterclockwise.
POI (Point of Interest): This flight mode keeps the drone’s camera focused on a specific place or object.
RPAS (Remotely Piloted Aircraft System): This term is used when a drone is piloted from a remote pilot station.
RPM (Revolutions Per Minute): A unit of measurement that describes the number of times a blade rotates per minute.
RTF (Ready-to-Fly): These types of drones can be flown right out of the box and don’t require extra assembly. They are great for beginners.
Spotter: This person helps the pilot, by keeping the drone in their visual line of sight. It is also called a VO (visual observer).
sUAS (Small Unmanned Aircraft System): This is the official term used for drones that weigh less than 55 lbs.
UAS (Unmanned Aircraft System): This is a common term for drones, popularly used by the FAA and others.
UAV (Unmanned Aerial Vehicle): This is another common term for drones, popularly used by the FAA and others.
Throttle: Same as on a motorbike, for instance, this is the control that gives the motor of the drone power.
Thrust: The amount of force the drone expels that generates lift, controlled by the throttle.
Trim: These are the buttons on the side of a drone’s remote control that manage certain actions, such as throttle, roll, or yaw.
VLOS (Visual Line of Sight): It is sometimes just called LOS. This is a FAA requirement, which states that the drone has to be visible to the pilot at all times, without the aid of a device, like binoculars.
VO (Visual Observer): This person helps keep an eye out for obstacles when the drone is in flight and can also help keep the drone within sight for the pilot.
UAV Controls
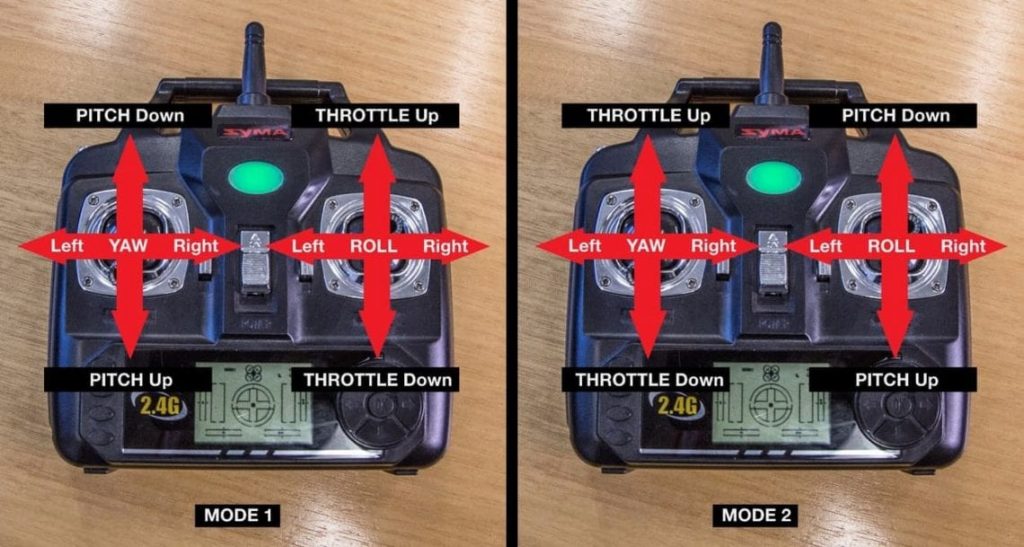
Drones are commonly manufactured with the left stick controlling the yaw and throttle, and the right stick controlling the roll and pitch.
Although this isn’t a standard that all drone manufacturers abide by, and some drone flight controllers let people remap the controls, we’re going to be talking about the “normal” controls in this article.
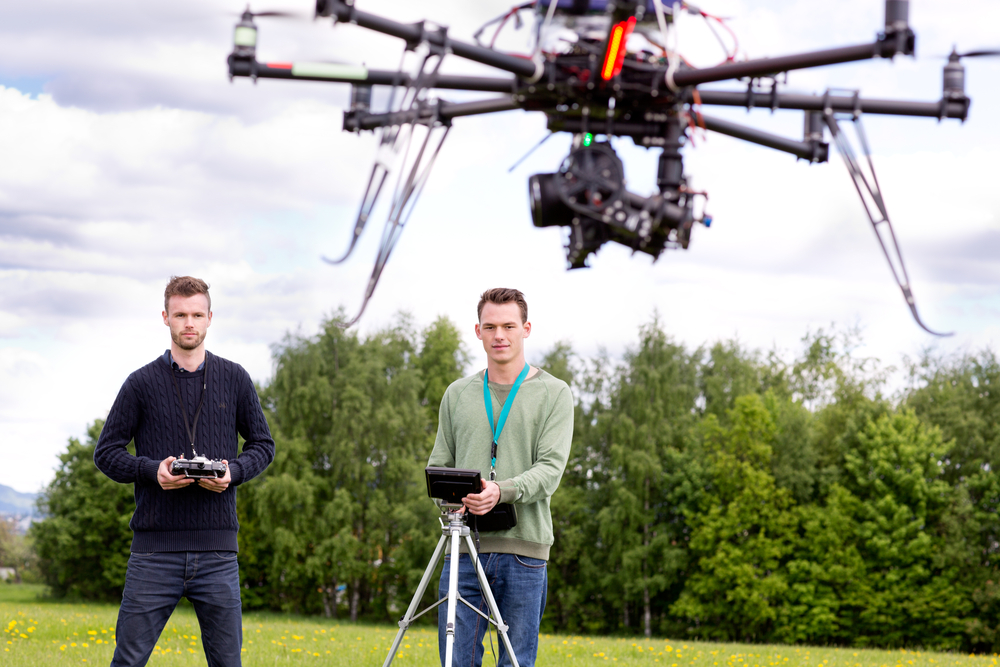
Operating a drone safely and accurately begins with understanding the flight controller.
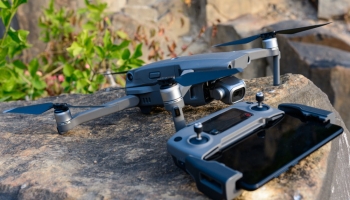
This device often resembles a gaming remote controller, but some drones are also controlled via smartphones or tablets via an app.
Some of the more high-end drones come with more complicated controllers, which may be overwhelming for first-time pilots and take longer to get accustomed to.
When an operator pushes and pulls on the flight controller sticks, it will make the drone go up, down, left, right, diagonally and rotate around.
There are several official titles for the functions on a controller, some of which have already been mentioned in the glossary.
Here is a quick breakdown of the most important – and commonly used – ones:
Left Stick
The left stick usually controls the:
- Yaw: This is the rotation from the drone, either clockwise or anti-clockwise. Pushing the left controller left or right (in other words, along its x-axis) will make the drone rotate left or right in relation to the ground.
- Throttle: Similar to any other type of moving vehicle, the throttle gives it power and makes it move forward. Pushing the left stick up or down (along its y-axis) controls its throttle. It iw important to get used to this control, in conjunction with other controls. It is the one that will be used most of the time.
Right Stick
The right stick usually controls the:
- Pitch: Pushing the right controller up or down (along its y-axis) will control the drone’s pitch, either up or down. When used along with the throttle, the pitch will make the drone move forward in an upwards or downwards trajectory. It is important to get used to using these two together.
- Roll: If the right controller is pushed left or right (along its x-axis), it will make the drone roll in either direction, depending on your preference. It makes the rotors on one side of the drone move faster, while the rotors on the other side slow down. This is a particularly helpful maneuver for avoiding obstacles. However, it can easily result in crashes or the drone getting out of control if, you’re not careful.
These aren’t always the only controls that are available on a flight controller, but they are the most important/most used ones.
Know your Radio Transmitter
While we’ve discussed the radio transmitter (controller) in the previous sections, let’s take a closer look at it now.
It is essential that a drone operator is very familiar with the way their transmitter works, especially with the more complicated models.
In this section, we’ll discuss how drone radio transmitters (also drone controllers or drone remote controllers) work.
Every drone setup has a radio transmitter and receiver.
The transmitter can come in many forms, including a complicated handheld device, a more game-like controller or even a mobile phone app.
The receiver is always embedded somewhere in or on the drone, and usually doesn’t require any setup.
However, it may require some periodic reconfiguration , depending on interference or damage from a crash.
Drone Radio Frequencies
Drone operators must learn how the transmitter works, so they can use the controls correctly and readjust the settings, if there’s interference.
The controller transmits radio signals wirelessly to the receiver on a specific frequency.
Not every drone uses the same frequency.
This typically depends on the drone manufacturer and model.
Manufacturers usually rely on a set range of frequencies for their drones.
Keep in mind that these frequencies can only travel a certain distance.
For example, a 27MHz frequency has a limited range of about 10-15 nautical miles, while a 900MHz frequency can technically reach as far as 30 miles.
Make a note of the frequency a drone can fly before buying it, especially if you’re planning on flying your drone farther than your yard.
The receiver translates those signals into the movements that the drone makes.
The receiver must be compatible with the transmitter, so many drones only work with the stock controller.
However, some drones do accept a different controller that is compatible with the drone.
It’s even possible to bind two controllers at the same time with some drones.
The frequency must also be the same on both drones.
The only exception to this is drones that work with a smartphone or tablet, which function through either Bluetooth or Wi-Fi.
Transmitter Controls
As you’ve already seen in the previous chapter, a drone always has the following four controls:
- Throttle: Moving the left stick up and down gives the drone power to move, usually up without any other control input.
- Pitch: Moving the right stick up and down tilts the drone forward and backward.
- Roll: Moving the right stick to the left or right moves the drone from left to right, by tilting the drone in either direction.
- Yaw: Moving the left stick to the left or right rotates the drone clockwise or counterclockwise in a circular motion.
With each of these controls, the further you push a stick in a direction, the faster a drone will fly in the corresponding direction.
However, remember that every controller is different and the amount of force you exert with one may not be exactly the same amount of force for that particular drone.
You should take the time to familiarize yourself with the controls, whenever you work with a new controller.
Every controller will look and feel different.
While some drone controllers come with screens, many of the high-end models do not.
However, they normally do allow drone operators to attach either a smartphone or tablet to act as a screen.
Advanced Drone Controls
While these are the four main controls drone owners mostly use, many transmitters have additional controls, modes, and settings available.
The more expensive drones can have especially complicated computerized transmitter controls.
For example, trim controls work in tandem with the four main controls to counterbalance excessive sway in any direction.
If the drone seems to be tilting too much in any direction without your input, then you can use the corresponding trim buttons to correct that.
Some manufacturers, like DJI, also sell an additional Smart Controller that works with their Mavic 2 models (technically any model that supports OcuSync 2.0).
These controllers offer extra mobile app features and are able to post videos and photos directly to the web.
OpenTX, on the other hand, is firmware that more advanced drone operators can install on computerized transmitters, which unlocks more advanced features. The process and software are complicated and not recommended for newbies.
Types of Drones
The world of UAVs is constantly evolving, as adoption becomes more widespread, and the technology gets more advanced.
There are several types of drones to choose from.
They each have their own set of benefits and drawbacks (depending on the operator).
Drones are a little like cars – one person might love a certain brand or model, while another finds they rather like the look and feel of a different car.
There are many models, brands, and different designs.
Each of them is slightly different from the other.
However, there are four main types of drones:
-
Multi-Rotor Drones:
Multi-rotor drones are the most common type of drones.
They are also what people normally think of when someone talks about drones.
People are used to seeing the quadcopter (four rotors, two on each side), but there are also bi-copters (two rotors, one on each side), penta-copters (five rotors), hexa-copters (six rotors, three on each side), and octo-copters (eight rotors).
While some multi-rotor drones can be used for more demanding work, like industrial inspections and aerial mapping, these drones are typically more popular for hobbyists and professional photographers.
There are two reasons: multi-rotor drones usually don’t have a long battery life and require constant recharging.
Many multi-rotor models are also slower than some other types of drones.
They are fantastic for taking compelling aerial footage.
However, due to precision controls they provide better control over the drone’s position.
This is why these drones are so popular among photographers and videographers.
Multi-rotor drones are also cheaper, on average, than the other four types of drones listed here, making them a more popular choice.
-
Single-Rotor Drones:
Most people will see a single-rotor drone and think of it as a small helicopter, which technically isn’t wrong.
Like helicopters, these drones have a single rotor to lift it up, as well as a smaller tail rotor to help with direction.
While single-rotor drones are much more fuel-efficient than multi-rotor drones – and can actually support a gas motor instead of just batteries – they are still a pretty niche type of drone.
There are a few reasons for this.
Firstly, these drones are more complex to fly than their multi-rotor counterparts.
You would think that with fewer spinning parts, these drones would be easier to fly.
However, the opposite is actually true.
They’re also harder to maneuver and tend to have a lot of vibration caused by the motor and single rotor.
As a result, they are not popular with photographers While they are able to hover, making them a bit easier to learn than fixed-wing drones, their complexity continues in the landing, which is a lot less forgiving than multi-rotor drones.
The blades on the single-rotor drones also tend to be very long, in order to support the drone’s weight, adding more risk and the potential for serious harm, if people aren’t careful.
In addition, single-rotor drones tend to be more expensive than multi-rotor drones and require more maintenance.
Nevertheless, single-rotor drones are popular options for operators who need to carry payloads, and in agriculture and aerial mapping.
-
Fixed-Wing Drones:
Many people are not aware that a UAV doesn’t need to have rotary blades to be considered a drone.
Fixed-wing drones have actually existed for some time and have been used in the military and professionally for a couple of decades, with a few hobbyists also using them.
Less than a decade ago, however, drones started gaining more commercial popularity.
The use of fixed-wing drones also increased, although multi-rotor drones quickly outgrew these drones in terms of commercial popularity.
Unlike drones that use rotors to defy gravity, fixed-wing drones use the same aerodynamic principles that apply to aircraft to provide lift.
They’re some of the most energy-efficient drones, since they only need to use energy to move forward and not up as well.
The clear disadvantage is that they aren’t able to hover in one spot.
As a result, they are not useful for most photography professionals.
However some videography professionals may still find them useful.
Taking off and landing is also much more complicated, since operators usually need a runway or ample space and an appropriate surface area to provide a runway.
Fixed-wing drones are much harder to control than multirotor drones.
They also don’t give operators much leeway to slow down and think about the controls.
It is not possible to just launch one in your backyard.
You have to be comfortable with the controls and confident in your flying skills.
Otherwise, it much more likely that there will be a crash.
Fixed-wing drones are capable of covering much larger distances and can be considerably faster than other drone types.
This is why they have been so popular with the military.
-
Fixed-Wing Hybrid VTOL Drones:
Fixed-wing hybrid drones are a very new type of unmanned aircraft.
That is why there are so few available in the market.
Although there are more currently being developed, it is difficult to determine their future popularity.
They are much more energy-efficient than rotorized drones because their fixed wings improve their aerodynamics.
This type of drone is also much easier to learn to use than regular fixed-wing drones.
This is because the rotors help stabilize it, it can hover in place and it doesn’t need a runway to take off or land.
There are a variety of different hybrid fixed-wing aircraft designs currently being developed.
However, as the technology improves and becomes more widely adopted, the design will probably also become more standardized.
Main Drone Parts
Drone owners or operators want to be familiar with every part of the aircraft.
You should know how it works, so that you understand what you’re dealing with.
You also need to be able to troubleshoot – and fix or replace any parts, if something goes wrong.
There are several types of drones, with their own design and distinctive parts.
However, the focus of this discussion will be on the most popular model.
Owners of other types of drones will be able to find guides on the web.
The different parts of a quadcopter:
Frame: The frame houses and supports all of the other components on the drone. Although quadcopters usually come in a cross shape, there are also X designs. Most drone frames are made out of carbon fiber, which is a strong but lightweight material.
Propellers: These make it possible for drones to fly. Quadcopters have four propellers, with two on each side. Most multi-rotor drone propellers turn at a rate of around 8000 RPM. You must be aware of these at all times. You should keep your fingers out of reach – they can do quite a bit of damage.
Radio receiver: The radio receiver is an antenna on the drone that receives signals from the radio transmitter (controller). When you adjust any of the controls on the transmitter, the receiver relays that information and moves the drone.
Battery: Drones support a variety of rechargeable battery types and sizes. Smaller, commercial-use drones typically come with Li-ion cell batteries. They can’t sustain flight for long periods of time. More expensive drones support bigger Li-po batteries that provide more power. Batteries need to be recharged before each flight and can be replaced, when necessary. You can buy multiple batteries for your drone to prolong flight times by switching out batteries. Drone batteries usually come in a brick-like shape, and bigger/stronger batteries also tend to weigh more.
Drone motor: The motor gives power to the drone’s propellers. Since a quadcopter has four propellers, it needs four motors to make each propeller turn. The strength of the motor (in kV) determines the rotations per minute (RPM) of the propeller, usually measured in RPM per volt.
Electronic Speed Control (ESC): These are the wired components that connect the radio receiver, propellers, and motors on a drone. They can be fragile, so it is very important that they stay intact. The propellers on a multi-rotor drone operate independently from each other. If one propeller’s wiring is damaged, it is very likely to result in a crash.
Flight control board: This is the central processing unit of the drone. It controls important functions, such as the drone’s accelerometer and gyroscope.
Radio transmitter: This is the drone remote controller that an operator uses to give the drone instructions on how to fly. There are different types of drone transmitters. It is possible to buy a new controller and pair it with the receiver on a drone. You must ensure that the drone supports this controller and that both the transmitter and receiver are using the same frequency.
Battery charger: Similar to a smartphone, a drone’s battery can be recharged by plugging it into the charger.
How to Calibrate Your Drone
You don’t have to calibrate your drone before every flight.
However, you must calibrate a drone before its first flight.
If a drone has been in a crash, is flying inconsistently or something seems off, then it may also need a calibration.
There are other instances when a calibration could be needed, such as if you haven’t flown for a while or if you’re flying in a new spot that is about 10 miles or more from where you had flown previously.
Drone Calibration Preparation
The following recommendations should be taken into consideration for drone calibration:
- Much like a regular flight operation, an open area with ample space to fly and no obstacles is needed.
- Make sure that the battery is fully charged.
- Remove the propellers and gimbal protector.
- Make sure the controller is working properly.
- Try to avoid hot and/or windy weather.
- Make sure that the drone has cooled off before calibrating. It takes at least 10 minutes to cool off properly, especially if it’s a warm day.
- Find a flat surface to set the drone down on.
What Needs Calibrating?
For multi-rotor – and most other types of – drones, there are two things that can be calibrated.
They are the compass and the inertial measurement unit (IMU).
Calibrating the Compass
A drone has to be aligned with true north at all times.
This is why the compass needs to be regularly calibrated, if your flying operation changes between different locations that are more than a few miles away from each other.
If your drone shows any GPS or location-related error messages, then you’ll also need to calibrate the compass.
- Before starting the calibration, take the drone to a spot that is situated away from concrete flooring, concrete buildings, large metal structures and cell phone towers. These items can all interfere with the calibration process. You should also make sure that the drone’s battery is charged, before getting started. Don’t forget to bring your controller along.
- Turn on the drone’s transmitter and controller.
- Make sure that the lights on the drone and the controller are all displaying a solid color, likely yellow.
- Set the controller down and pick up the drone. Start spinning it in one direction horizontally, keeping it level with the ground. Wait for the lights to turn a different color, probably green.
- If anything went wrong during the calibration process, the lights start to flash (usually a red color). This means you’ll have to restart the whole process.
Calibrating the IMU
The IMU is a circuit that controls the roll and pitch of the drone, even when a controller isn’t giving the drone any input.
The IMU keeps the drone upright and level relative to the ground.
Here are the steps to calibrate your drone’s IMU:
- If you don’t have it installed yet, download the iFly application for your smartphone or tablet now.
- Set the drone down on as flat of a surface as possible, like a table. Doing this indoors is fine, since the drone won’t be flying during the calibration process.
- Power up the drone, remove the gimbal guard (if it’s still in place) and make sure the drone is facing to your left.
- Open up the iFly application and look for the safety file. Find the IMU calibrate button and click on it.
- Wait for the calibration to start, then when ready, face the drone to the right and place it on its side, so that the top of the drone is facing in your direction.
- After a few more seconds, place the drone so it’s facing straight up. You may need to hold up the drone for this part, since its legs might not support this position. Try to keep it as still as possible, until it’s done calibrating.
- Finally, position the drone so it faces to the right again. However, it should be upside down, with its top on the flat surface this time. Wait for the calibration process to be completed.
Some drones use their own apps to calibrate the aircraft.
In this case, open up the app, find the drone calibration button (usually somewhere in the safety settings) and follow the instructions.
You’ll have to follow a similar process as described above, where you have to turn the drone while holding it level with the ground.
Drone Flight Modes
Drones are complicated machines.
Most models can support a few different modes.
Your controller will usually have buttons that allow you to switch between these different flight modes.
Auto-level: This is also called ATTI or Altitude mode. It mode ensures that when both sticks on the controller are in the middle (not being used), the drone automatically levels itself out.
Manual: Much like with a smartphone camera, people use this mode to gain more precise control over their drones. With the manual mode activated, a drone will not automatically level itself out after the UAV has been rolled (tilted) in any direction. Unlike the auto-level mode, the drone will not return to a level position, when you let go of the sticks on the controller.
GPS Hold: This mode is similar to the auto-level mode since it levels the drone out after you let go of the controller sticks, except it uses the GPS to do so.
Important Drone Safety Precautions
Drones may feel like toys, and they’re certainly fun to play with, but they should never be taken for granted.
These are still sizable flying pieces of hardware with rotating motors and there are situations where things can quickly get very unsafe.
Remember to respect the drone and stay respectful of other people and objects in the area.
If you realize that you’re about to crash the drone, try to drive it away from anyone that can get hurt or anything that can get damaged.
Stop applying throttle and also have the drone slow down as much as possible to minimize any potential damage.
Always be aware of the rotating propellers, when you’re handling the drone.
Don’t put your fingers near the propellers when they’re in motion and turn the drone off before handling it.
If you’re not using the drone or planning on doing any sort of maintenance work on it, remove the battery first to prevent it from turning on accidentally.
When it comes to drone safety, there are some regulatory restrictions you need to keep in mind.
The drone must be kept within the line of sight and not flying faster than 100 mph (160 km per hour).
The operator also must not be under the influence of any substances.
However, for the most part, just apply common sense.
Don’t fly too near other people or any obstacles, don’t get overconfident and don’t try to show off with crazy maneuvers, unless you’re prepared to lose your drone.
The Best Places to Learn How to Fly
As mentioned before, the best places to learn how to fly a drone are wide open spaces with few obstacles to fly into.
You absolutely do not want to launch your drone inside a building – at least not until you’ve got the hang of things and feel comfortable enough to be fully in control.
Many people prefer to take their drones to parks or open pieces of land to practice.
The grass helps provide a “softer” landing that might the drone from getting wrecked during any crashes.
Some people also prefer to try their maiden flight out at the beach, which can also work.
However, you must be extra careful to keep your drone from dropping into the ocean.
Stay away from buildings or narrow streets for now.
These can be hard to navigate and you don’t want to damage any property.
Many cities and towns have rules about where you can fly a drone.
It is easier to get into trouble, when you’re flying in more densely populated areas.
This is especially true if you’re not very familiar with the laws of that area.
Probably one of the most important unofficial rules is to make the launch site somewhere where there aren’t a lot of people.
You may make a lot of mistakes when you’re first starting to learn how to operate a drone.
You don’t want to face litigation, if your drone crashes into and hurts someone.
People, especially children, can also be a big distraction and might become bothersome.
This could lead to confusion and leave you feeling flustered, as you’re trying to learn a rather complicated new skill.
There are several helpful resources on the web that can point out the best places to fly in your area.
It can also be helpful to investigate any drone clubs or forums.
Other drone enthusiasts can help you out and may know of good local spots.
Finally, the FAA helped create a mobile app, B4UFLY, for recreational drone pilots that displays interactive maps of where people are allowed to fly, as well as information on when it’s safe to fly.
How to Practice Flying a Drone
Similar to many other skill-based hobbies, practice makes perfect when it comes to drones.
Yes, there are many technical terms and controls that can seem overwhelming at first.
Many people can get discouraged when they realize that, even though the controls may look similar to gaming controllers, it is not really a toy and flying a drone is much harder than they first imagined.
When you first start learning how to fly a drone, you must become aware of how each of the controls affects the drone’s movement, as well as how combinations of these controls work together.
That is the most important part.
You’ll also want to familiarize yourself with the different parts of the drone and what you need to do before setting off, as well as after takeoff and landing (more on this in the coming chapters).
Practicing on a regular basis requires that you find somewhere safe and relatively quiet (little foot traffic, regular traffic, or people hanging about) to practice.
You’ll want to first research the drone laws for your area (including state and federal laws) to make sure you’re allowed to fly wherever you decide to practice.
Many people start out in their backyards first.
However, remember to be mindful of your neighbors.
If you do stick to your backyard, you may need to let the neighbors know you’ll be practicing and get their permission first.
This is because some states/municipalities have laws against flying over private property without the owner’s permission.
While backyards are great, you would ideally want a bigger open space to practice different techniques that may take up more space as you learn to refine your control, and especially for longer continuous flying operations.
Check first whether your local parks allow drones – some only have designated areas for drone flying and some don’t allow drones at all.
When you’re first learning to fly, it’s natural to want to constantly look at the camera feed and/or search for cool shots.
However, forget about all of that for now.
Stick to keeping your drone within your sight and learning its movements.
Watching the camera feed can make you feel dizzy at first and lose track of where your drone is headed, if you’re not careful.
In the end, there’s no “right” way to practice drone flying.
You have to take it at your own pace and find the place that’s best suited to your needs, if possible.
Luckily, there are many handy resources to help you on your way.
Look out for any UAV clubs or organizations in your area.
They can help you with practical tips. It’s also always more fun to have someone around to practice with.
The Pre-Flight Checklist
Pre-flight planning is recommended by the FAA.
It includes list items like checking the weather, equipment and flight path.
Having a pre-flight checklist is essential to ensure both you and your expensive drone stay safe.
You should always go through your personal checklist before taking off.
Below are some suggestions for a comprehensive pre-flight checklist, but you may want to tailor it to your own situation as time goes on and you learn what works for you.
General Safety Checks
- Check the weather before heading out. The wind speed should ideally be under 15 knots (20 mph). Otherwise, it starts to get hard to control the drone, which can be dangerous. Early mornings tend to be less windy, so this might be a good time.
- If, however, you do choose to fly in the early morning (or at dusk) make sure when civil twilight hours end for the state that you’re in, as these times can differ. Drones typically aren’t allowed to fly at night. They must have the proper lighting and add-ons.
- Check the probability of precipitation (chance of rain), which should ideally be under 10%.
- Check the visibility of the area. There shouldn’t be any mist or clouds obscuring your view. The FAA states that, officially, the minimum weather visibility in the U.S. is three miles for drones.
- Establish safe takeoff, landing and possible emergency landing spots in the area.
- Make sure that you have everything you need, before heading out. This doesn’t just include your drone and any relevant hardware (batteries, controller, backup batteries, etc.), but water, sunblock, and any other relevant items you need to also spend a couple of hours outside.
- Check whether there are numerous other people or animals in the area, and set up a (imaginary) perimeter for yourself, if necessary, to keep them and your drone safe.
- Look out for obstructions in the area you plan to fly in, especially less visible obstructions, like power lines.
Basic Drone Hardware Inspection
- Make sure that moving parts are in working order and moving without any obstructions.
- Make sure that nothing is missing or looks damaged.
- Check whether the registration number is still properly visible on the drone and not damaged.
- Attach the necessary equipment, including batteries and propellers, if they’re not attached yet.
- Before setting off, remove the gimbal clamp and lens caps.
- Wipe the camera with a soft cloth to ensure a clear shot.
- Insert an SD card, if necessary, and make sure there is space on the card.
Takeoff pre-checks
- Turn on the controller/transmitter and turn on the drone.
- Make sure the drone and the controller are connected and the video feed is displaying correctly.
- Calibrate the compass before the first flight, then only do this again as necessary, for example, if the drone flies inconsistently.
- Depending on the model of your drone, you may need to do some other calibrations. For example, DJI drones get firmware updates and require that you install the updates before you can fly again.
- Check that the battery/fuel levels are acceptable.
- Before zooming off, hover the drone at about eye level for a few seconds first. Check that it’s flying normally and that it isn’t making any strange sounds.
- Check that the camera feed is working properly and displaying correctly.
- Practice a few quick practice techniques, such as flying in square and circle patterns, to check that all of the drone’s controls are working properly.
- Finally, make sure that the software/controller is working properly and that there isn’t any interference with the signal.
Most Common Beginner Mistakes
Mistakes are part of learning. However, avoiding some beginner mistakes can help you learn how to fly a drone faster when you’re practicing. Common mistakes include:
- Not sticking to drone regulations (more on that later),
- Flying too fast,
- Flying too high,
- Not looking out for power lines and telephone lines,
- Having the wrong attitude (a drone pilot has to be in a state of calm control at all times),
- Not taking the wind into account,
- Not realizing where the edge of the drone’s operating range is, when it loses connection to the controller.
How to Get Your UAV off the Ground
For your first flight, it’s important to find a big open space to fly your drone around.
You don’t want any obstacles that have to be navigated around or a lack of space to get your bearings.
It is also better if there are as few as possible people around.
It is not just because they can be distractions, but also because drones are dangerous when the pilot isn’t in full control.
The FAA also has rules against flying drones directly over groups of people, and the agency has a rule against flying in a dangerous or reckless manner.
You should also make sure that the FAA allows legal flight in this area.
There will be more on that later.
It is better to avoid flying in any areas that people regularly visit.
After picking an appropriate space, you should set your drone down in a safe spot.
The next step is to connect the drone’s battery and then step a couple of feet away.
Before turning the drone on, you should push down on the left throttle of the flight controller, so that when the drone powers on, it doesn’t rise up into the air or hover away over the ground uncontrollably.
After pushing the throttle all the way down, turn on the transmitter.
Before getting too excited and driving the drone off into a direction, practice taking off and landing first.
Keep your hand off of the right stick and then slowly push the throttle back up to make the drone hover in the air.
The key is patience. After getting the drone a few feet up into the air, then lightly press down on the throttle and try to land the drone as smoothly as possible.
How to Hover in Mid-Air and Land Your UAV
This may sound like a silly exercise at first.
However, whenever newbies get their drones up in the air, they quickly realize how hard it is to keep a drone hovering steadily.
It may be slightly boring at first, but it shouldn’t take too long for most people to get used to the controls.
Practicing mid-air hovering helps you to gain confidence in your flying skills and allows you to learn to maintain full control of the drone’s movements at all times.
Follow the same steps for getting your drone off the ground as outlined above.
Then try to keep the drone hovering in the same space, without it tilting too much in any direction.
Flying a Drone Left/Right and Forward/Backward
After learning the skill of hovering, you will want to practice slowly maneuvering the drone around.
This will give you a feel for how it flies, as well as the sensitivity of the flight controls.
Try flying the drone from left to right and forwards and backwards, using the right stick on the controller.
You can also try rotating and even rolling a bit, when you feel ready.
The operation of these controls is described below.
The trick is that you must use both the left and the right controller sticks in tandem to get this right.
If you want to go forward, you have to push up with both sticks at the same time.
Just try to keep it as slow and steady as possible at first, until you learn the controls.
No one wants to have to fish their broken drone out of a neighbor’s tree!
How to Fly a Drone in a Square Pattern
Once you’ve gotten familiar with the drone controls, you can start practicing different techniques with your drone.
Keep in mind that mastering these controls is the most important part of being a drone pilot.
It will take some time for most people.
When the drone is facing towards you, for instance, some of the controls will essentially be “swapped around”.
It can be hard to get used to that at first.
Therefore, instead of moving away from you when you push the right stick forward, the drone will then move towards you.
For some people, this will feel very intuitive, while others might need a few tries to get used to it.
In order to become more acquainted with your drone, you can try a few simple exercises that will test both your hand coordination and your spatial awareness.
The first is the square pattern test, where you simply try to keep your drone at a steady altitude while flying in a square pattern.
It’s harder than it sounds!
Try to go as small as possible with the square to start, then keep making the square smaller to see how well you keep it up.
In this exercise, you need to keep the drone facing away from you at all times.
To start off, you’ll want to have the drone already hovering on your starting spot, then push the right stick forward (pitch) while keeping the left stick steady to move your drone forward.
Once you reach the invisible corner of your square, you can then push the right stick back to the neutral position and then to the right (or left, depending on your preference) to move the drone to the next corner in a straight line.
Finally, move the right stick back to the next corner and then left to close off your square at the starting point.
When practicing the square pattern, try to minimize the time your drone stops at each corner and try the exercise both ways (left and right).
How to Pilot a Drone in a Circle
After you’ve mastered the square pattern, you can try out a circle, which is a little bit harder.
Again, get the drone hovering just above your starting point and keep your left stick steady.
You should also remember to stick to a slow speed when trying out these maneuvers.
This it makes the drone easier to handle and ensures that you won’t accidentally shoot your drone off into a wall or something else.
This is similar to a square pattern exercise, except you will try to round off the corners, instead of stopping at them.
You will also have to have to use both sticks to turn the drone, instead of keeping it pointed forward, which which significantly increases the difficulty level.
To make a circle (it doesn’t have to be perfect), you must operate the left stick from side to side (yaw) to rotate the drone.
You can start off with a square pattern to get a handle of the controls.
Then you can tighten the corners as you get used to it.
As in the previous exercise, start your square by moving forward.
However, when you start nearing the corner, push both the left and right sticks to the right.
This will start the turn.
After you feel that you’ve completed the turn, return the left and right sticks to the center position.
However, keep the right stick forward so the drone keeps moving forward.
Repeat this move three more times to complete your circle.
You want to reach the point where you can create a full circle that doesn’t no longer resembles a square.
Practice this exercise to the left and the right a couple of times to ensure that you’ve got it down.
You can also try to make the circle smaller, if you want to challenge yourself.
How to Rotate a Drone
If you haven’t tried this yet, now is the time to practice rotating your drone.
This is an important skill to have. You don’t want to have to chase after your drone to get it back.
Instead, you want to turn it around and fly it back to you.
It is also no fun to simply fly the drone in a straight line.
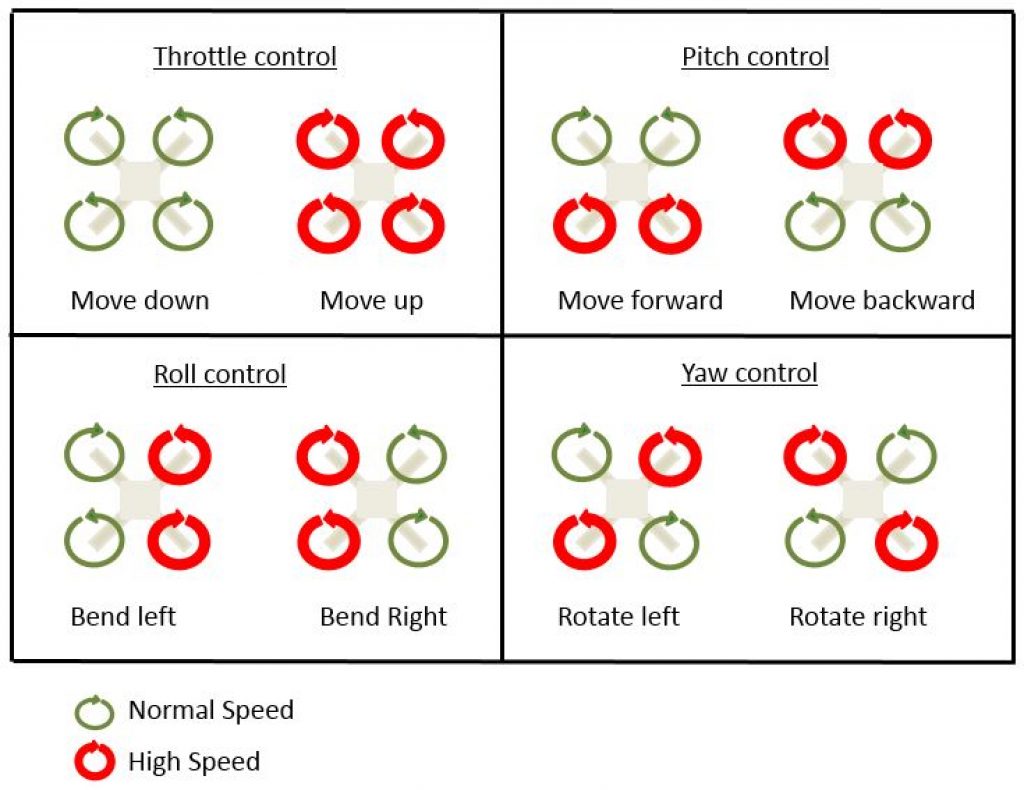
To rotate a drone, you must rely on the yaw control, on the left stick of the controller.
The yaw feature turns the drone’s motors in opposing directions and uses that torque to turn the drone.
Start by lifting the drone up from the start position and letting it hover a few feet in the air.
Next, push the left stick on the controller all the way either to the right or left but slowly.
Continue doing this, until you have turned the drone around about 180 degrees from its starting position.
Although this sounds simple, many people struggle at first because it can be difficult to keep track of exactly where the front and back of the drone is.
You’ll need to constantly keep track of the drone’s orientation.
Don’t get too frustrated if you have problems at first.
Many people struggle with keeping track of their drone’s orientation.
It just takes practice.
The circle exercise mentioned above will also help you practice rotating your drone and also give you a confidence in your flying skills.
Flying Your Drone Continuously
While practicing in your backyard can be fun, you’ll eventually want to explore the wider world from your newly acquired birds-eye view.
Flying continuously is a wholly different experience because you can’t practice a little, make a mistake or two and then start again.
Once you’ve started, you’ll have to keep track of the drone at all times.
You must continuously adjust according to where you’re going, obstacles, wind and applicable laws that you need to adhere to.
When you’re done, you still also need to fly the drone all the way back to you.
Sending your drone flying away can be stressful at first.
However, if you’ve practiced your flying skills, there should be nothing to worry about.
At least, as far as flying goes.
However, always make sure that you’re sticking to the FAA and local drone laws, whenever you send your drone up into the sky.
There will be more on these later.
As always, you will want to start your drone off from a safe spot on the ground.
Keep your finger pressed down on the left stick, until you’re ready to lift up.
This time around, you’re probably going to go higher than you have before.
Therefore, make sure to use your drone’s camera feed (if it has one) in conjunction with keeping it within your line of sight at all times to orient yourself.
To lift up, simultaneously – but slowly – push up on both the left and right sticks.
Only push up with the left stick, until you’ve reached a desirable altitude.
Then put it back into the neutral position.
Keep pressing up on the right controller to move forward.
You may now also want to use the left controller (left or right) and the other directions on the right controller to change direction.
Make sure to constantly be on the lookout for potential obstacles around your drone and on its intended path.
It’s essential that you retain full control over where your drone goes at all times.
Before heading too far off, you may also want to practice rotating the drone around and flying it back and forth in straight parallel lines first.
This will ensure that you will be able to get the drone back to you.
Beginner Drone Flying Techniques/Skills
Even though we’ve already covered most of these flying techniques in the preceding chapters , here’s a quick list of all of the skills a beginner drone pilot should master.
- Lifting up and hovering in space.
- Landing safely and slowly.
- Flying the drone forwards and backward, and from side to side.
- Flying the drone in a square pattern.
- Rotating the drone.
- Flying the drone in a circle.
- Flying the drone back and forth in parallel lines, by turning the drone 180 degrees.
- Alternating the altitude (height) of the drone.
- Landing on specific targets, instead of just anywhere on the ground.
Advanced Drone Flying Techniques/Skills
Anyone who feels comfortable with their drone, and has gone out on at least a few operations, can consider trying out some more advanced techniques.
While these aren’t technically necessary, they can provide a fun but challenging way to improve your precision flying skills even further.
There are a few new techniques you can try, to flesh out your drone flying repertoire.
This includes the figure 8 maneuver and bank turns.
They sound simple enough in theory, but you have to know the technical process behind what’s going on to really master these moves.
The Figure 8 Maneuver
For a figure 8, you’ll want to keep the camera facing forward in the direction you’re flying the entire time, like with the circle exercise.
You then need to manipulate the drone into a horizontal figure of an 8.
This means you will have to replicate the circle exercise, except when you reach the starting point, you have to change directions.
It helps to do this exercise slowly, so you can ensure that the drone doesn’t fly off too far in any one direction, keeping the circles as tight as possible.
You’re again also welcome to tighten the “circles” when you start to get the hang of it, to challenge yourself even further.
Many people also prefer to use cones or other markers on the ground to orient themselves.
Bank Turns
Start with the drone hovering a few feet in the air.
If you usually have the drone hovering only couple of feet above your head, make it a few feet higher than you normally would to avoid accidentally crashing into the ground or obstacles during this maneuver.
First, tilt the roll control on the left stick a bit in either direction, while continuously pulling up on the pitch and turning to left or right with yaw, depending on the direction you chose.
The yaw is especially important, because applying too much on it will result in the drone lifting out of the bank turn.
If you do not apply enough yaw, it will result in the drone falling. It may take a while to get this exactly right.
There are some additional exercises you can try to advance your drone flying skills (with new techniques being added to the roster every now and then as people play around with their UAVs).
However, these two are fairly popular among drone enthusiasts and should help you get started on your way to becoming an experienced drone pilot.
Drone Laws and Regulations
If you live in the United States, then you will have to follow the small unmanned aircraft rules set out by the Federal Aviation Administration (FAA), which controls all aircraft regulations in the country.
All drone owners must register their drones with the FAA.
They are also required to paste their registration number in a visible spot on the drone.
There is a small fee for the registration, which must be renewed every three years.
The registration process is slightly different, depending on whether you’re planning on flying your drone for fun (recreational) or professionally (commercial – in some business-related endeavor).
In addition to registering their drone, professional flyers must complete an aeronautics knowledge test and get their drone pilot’s license.
While recreational flyers don’t yet have to take this test to get their license, the FAA is working on also implementing this rule for recreational flyers in the future.
Recreational flyers need to be at least 13 years of age.
However, professional flyers must be 16 years or older.
The agency has also implemented different rules for drone operators, depending on whether they are flying professionally or recreationally.
Recreational flyers have the recreational flyer’s toolkit, while commercial flyers must stick to the rules set out in Part 107.
There are a number of state and local drone laws, in addition to FAA regulations.
Every state has its own set of drone laws (some have more than others).
Many local cities, towns and municipalities have also started enacting their own drone laws.
Be sure to research the drone regulations in your area before starting, even if you’re only planning on flying over your backyard or neighborhood.
You should also be aware that drone flying is prohibited in most national state parks.
You might be able to find a park in your area that allows UAV flying in designated zones with special rules.
You should investigate this in advance, since you will probably need a permit.
Please read our extensive guide about drone laws in all US states here.
Drone Insurance
Even if you are careful and have practiced extensively, accidents can still happen.
Drone accidents can result in crashes with serious and often irreparable damage to your drone.
As a result, you may want to purchase drone insurance.
Insurance isn’t currently required for drones in the United States by the FAA or any other organization.
However, some national and state parks and other organizations that allow drone flying within their boundaries require that you get specific drone insurance before you’re allowed to fly there.
Drone insurance might not be for everyone, and whether to purchase it should be considered carefully.
For example, if you own a smaller, less expensive drone ($500 or less) and you’re only flying in your backyard, expensive drone insurance might be worthwhile.
The compounding cost of the insurance would outweigh the reward should you need to eventually repair or replace your drone.
If you’re flying professionally as a contractor or you’re using your drone as part of your business, drone insurance should be seriously considered.
How Does Drone Insurance Work?
There are several types of drone insurance to consider.
For example, there’s drone liability insurance, which is similar to auto insurance.
The insurance protects you from third-party claims due to property damage or injury.
There’s also hull insurance, which covers the actual drone.
There are also numerous types of insurance plans offering different types of service.
Drone insurance providers consider a number of factors, when setting your insurance payment rates.
It can include the cost of your drone and related equipment, information about you and how you use the drone, where you’re planning to fly, how much training you’ve received and the number of hours you’ve flown, etc..
Drone insurers can drop your coverage for certain reasons, such as if you’re not logging your flights or have a habit of flying in a way that they consider to be unsafe.
How to Fly a Drone with your Phone
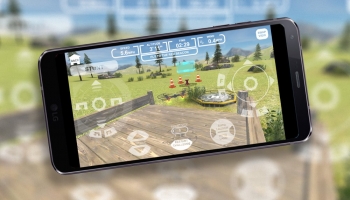
Controllers may have been the norm for most model RC aircraft, but many drone models can be controlled with a smartphone or tablet.
Many of the more expensive models still stick to the complicated transmitter controls, but cheaper toy drones support a smartphone connection via Wi-Fi or Bluetooth.
Flying a drone with a smartphone is relatively easy.
The process may differ somewhat between different brands. However, there are some general steps that you’ll need to take.
Search for the corresponding app for your particular drone’s brand or model, as indicated by the manufacturer.
Turn the drone on and then go to the smartphone’s Wi-Fi or Bluetooth settings to find the drone’s connection.
Once connected, open up the app and follow the setup and calibration steps to get the drone configured correctly.
You can then start flying, using the app as your drone’s controller.
Flying in Windy Conditions
It’s generally recommended that you don’t fly your drone in windy conditions.
Most drone experts advise that you check the weather and plan your operations accordingly to avoid unfavorable conditions.
Flying in the early morning can also help to avoid windy drafts.
Most commercial drones can still be safely flown at wind speeds of between 10 and 30 mph.
The general rule of thumb is that the wind speed cannot be more than two-thirds of the drone’s maximum speed.
Therefore, if you are having trouble with some wind during your flight, here’s what to do.
- Be very careful during the take-off and landing, since a strong wind can cause the drone to crash easily or even get flipped over on the ground, before you can get it properly airborne. If possible, stand upwind of the drone to block off some of the worst of it.
- Don’t enable manual mode on the drone, unless you’re very confident in your ability to keep the drone level. Otherwise, stick to the auto-level mode to keep the drone from flying horizontally against the wind, while trying to keep it level. However, with a strong enough wind, this may not even work properly.
- Be very attentive to what the drone is doing at all times and how it’s flying in relation to the wind direction. If it’s flying against the wind, then it will be slower. By contrast, if it’s flying with the wind, then it will be going faster.
- Watch the battery, since the drone will have to work harder in these conditions. Therefore, the battery will run out faster.
How to Prevent Flyaways
Losing an expensive drone can be a frustrating and anxious situation.
Whether you accidentally flew too far, suddenly lost your connection with the drone due to interference, or were distracted, there are several reasons for flyaways.
To prevent your drone from being lost, possibly forever, take some precautions.
First, determine the distance that your drone can safely fly and still stay connected to your controller.
As mentioned in the drone transmitters section of this article, every drone transmitter/receiver combination works with a certain frequency that can only travel so far.
You will usually want to keep your drone within your line of sight at all times, and not just because it’s FAA regulation, but also because it’s much harder to lose the drone that way.
Make sure to set a home point (or something similar, depending on the brand) if supported by your drone. supports that, so that your drone automatically returns to a particular spot.
It is also important to watch out for GPS or connection interference.
Some, but not all drones, provide a warning, if there’s any sort of interference with the drone’s GPS or the transmitter connection.
If you get a warning, turn the drone around and try to fly it back to you as safely as possible.
Drone Trainers and Simulators
Before buying a new drone, or upgrading to a more expensive model, you might want to first try out a flight simulator.
There are also many other reasons to try out drone trainers or simulators.
An example is if you want to train to fly in specific conditions.
Whatever your reason, there are plenty of great options to choose from.
These also come at a range of different price points, from $10 to $300.
Therefore, it should be easy to find something that fits your budget.
If you’re looking for something with more features, like trying to train in different conditions, then the software is going to be more expensive.
Before you buy a drone simulator, keep in mind that some drone simulation software was created for the purpose of teaching people to fly, while other simulators were created for people to train for drone racing.
Popular drone simulation software includes:
- Zephyr Drone Simulator
- Quadcopter FX Simulator
- droneSimPro Drone Flight Simulator
- Realflight RF9 Drone Simulator
- Hotprops FPV Drone Flight Simulator
- Phoenix R/C Pro Flight Simulator
- DJI Drone Simulator (works best, if you’re planning on getting/are using a DJI drone)
Drone Beginner Resources
New drone enthusiasts have many fantastic online resources available to them.
You should use them.
Many drone brands have support groups for any model-specific questions.
There are also online forums and drone-related social media groups that you can also join.
Some major brands, like DJI, even have drone support and tutorial YouTube channels.
You should also be able to find similar content created by enthusiasts for other brands.
You can also contact the manufacturer for support.
They should have a customer support line.
However, you should be able to contact them via social media, if you prefer to do so.
The FAA’s website is a good resource, since they provide some helpful information (although it is mainly geared towards regulation and safety).
There also might be community-based UAV organizations in your area.
These usually involve recreational flyers and aeromodelling clubs.
Drone Flying Tips
Try to connect with UAV flying clubs in your area. They can be very helpful, when you’re struggling to learn or have any questions. If you’re a hobbyist, finding people with similar interests to fly with can also add to the fun. If your area does not have many drone-related groups, you can try to connect with other drone enthusiasts through online forums.
The FAA has set up a helpful B4UFLY app. It lets you check where you’re allowed to fly in the United States. These interactive maps allow recreational flyers to see where prohibited airspace is located, such as around critical infrastructure. You can move around the map and search for specific locations. The app will show you whether it is safe to fly there and provide additional information. It is not foolproof, but it is relatively accurate. It is important to remember that while the app provides information about controlled and special use airspace, it is not possible to apply for a permit via B4UFLY.
If you want to obtain airspace authorizations to fly in controlled airspace, you can utilize the Low Altitude Authorization and Notification Capability (LAANC). The LAANC automates the application and approval process, and in most cases, you can get approval (or not) in as little as a few seconds.